Over the past few days I've seen this topic come up on the REAL Software Forums and the REALbasic NUG. There's quite a mix of information - some correct and misleading. Luckily, I've not seen information that is just flat out wrong.
The double mask effect
The single most common issue I see with masking is what I call "double masking" - which is the art of applying a mask to an image that has already been masked. Below, is an original PNG image shown on a background color. This is our "correct" image:

Now, the advice I commonly see is to use another program to retrieve just the mask from the png, then import both images into REALbasic. When this happens, you end up with two images:


Notice the white background on the first image. REALbasic doesn't properly handle the alpha channel, so you'll end up with that, thus the reason for this entry. Anyway, when you apply the third image as a mask to the second, you get this:

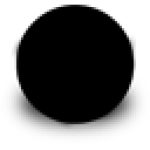
It looks reasonably close, but it's not correct. The blue shadow is too light, and in fact, has a white ghost effect to it. It certainly looks different from the first image - and that's bad. So what went wrong? Why did we not get the original image back? That's because image two already had a masked applied, we just didn't have translucency, the translucent image we wanted was drawn onto a white backdrop.
There is a difference between a pixel that is 50% black, and a pixel that is 100% black at 50% opacity. By doing this double masking, you essentially take a 50% black pixel and make it 50% opaque which is not correct.
Solutions
There are a handful of solutions. The easiest is to use the PNG Utilities plugin. It's open source, and cross-platform. Just store your images on disk and read them at run time. But what if your project has a requirement of not using any plugins or you really want to drag your images into the IDE? Then you need to be a little more fancy.
The solution I use in such a case is a small app I wrote to properly split a PNG into a new PNG with the data (not the composite, there is a difference) on the left and the mask on the right. That project has been linked with this entry, and does require the PNG Utilities plugin mentioned earlier. When images are dropped on the app, it will turn image one into:

Then, I can simply drag that new image into the IDE and use it as necessary, with the assistance of a simple method:
Function CombineImage(Input As Picture) As Picture
  Dim result As picture
  Dim w As Integer = input.width / 2
  Dim h As Integer = input.height
  result = newpicture(w,h,32)
  result.graphics.drawpicture input,0,0,w,h,0,0,w,h
  result.mask.graphics.drawpicture input,0,0,w,h,w,0,w,h

  Return result
End Function
That code will perfectly turn the combo image into the original image, image one. This method has the advantage of still only requiring one file per image too.
Misconceptions
Let's say you only have the composite image (image two) to work with. Well, then you're doomed and out of luck. You'll never get the image back to it's original 100% because crucial information is lost. You can, however, try to fake it and come reasonably close. Photoshop can help with this, but there's no how-to for this because every image is different. If I were going to try to do it with the sample used here, I'd use a circle select to delete everything outside the globe, and try to recreate the shadow by hand. But there is no tool that can do that for you perfectly because at that point, information is lost.
As you can tell, I like PNG. That's because it is lossless (basically meaning full quality) and smaller than JPEG. PNGs are only sometimes smaller than GIF, but GIF cannot display a full color spectrum. JPEGs can be made smaller than PNGs, but at a loss of quality. There is TIFF too, but it's not often used (besides in Apple apps) and we have the PNG Utilities plugin to work with. So I typically go with PNG every time.

